Note
This page was generated from tut/1-Overview/1.6-QComponent-shape-library.ipynb.
1.6 QComponent Shape Library
Quantum Metal ships a set of sample shape QComponents — subtract polygons, spirals, n-gons, and hollow rectangles — that are useful for:
Custom chip features (flux bias lines, wirebond pads, markers)
Prototyping arbitrary geometries before writing a full QComponent
Teaching: each shape shows a minimal QComponent implementation
This notebook demonstrates each shape on a fresh design.
[ ]:
from qiskit_metal import designs, MetalGUI
import qiskit_metal as qm

%matplotlib inline

design = designs.DesignPlanar()
design.overwrite_enabled = True
print("Design ready")
[59]:
%metal_heading More QComponents
More QComponents
Basic and crazy shapes.
See their source code to see how to get started on a few simple examples.
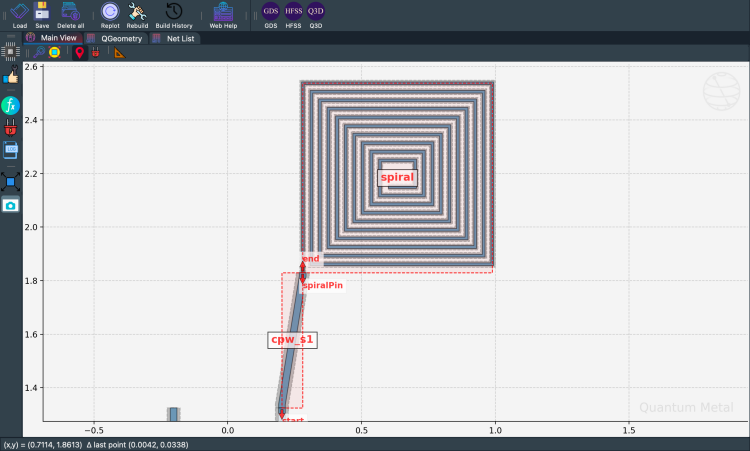
[60]:
from qiskit_metal.qlibrary.sample_shapes.n_square_spiral import NSquareSpiral

# print(NSquareSpiral.get_template_options(design))
ops = {
    "n": "10",
    "width": "10um",
    "radius": "100um",
    "gap": "22um",
    "pos_x": "0.65mm",
    "pos_y": "2.2mm",
    "orientation": "0",
    "subtract": "False",
}
NSquareSpiral(design, "spiral", ops)
NSquareSpiral(
    design, "spiral_cut", {**ops, **dict(subtract=True, width="22um", gap="10um")}
)
gui.rebuild()
To see source, try ??NSquareSpiral. Go to the actual source file and edit it, copy it, or edit it in the GUI using the Edit Source button.
[63]:
qcomponents = ["spiral"]
gui.highlight_components(qcomponents)
gui.zoom_on_components(qcomponents)
gui.screenshot()
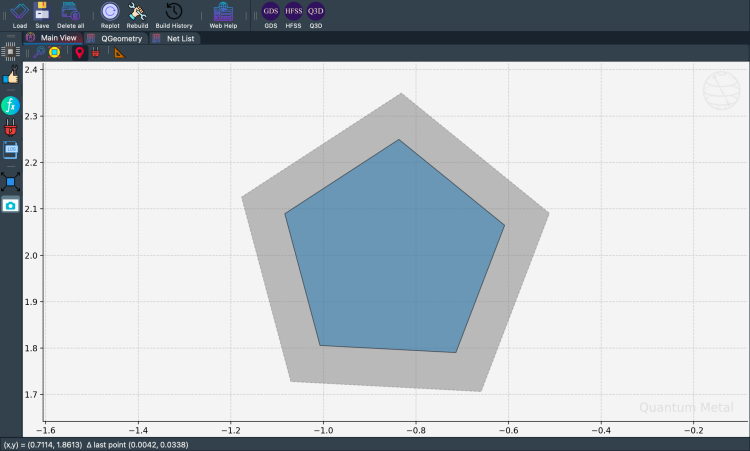
NGon
[64]:
from qiskit_metal.qlibrary.sample_shapes.n_gon import NGon

# display(NGon.get_template_options(design))
ops = {
    "n": "5",
    "radius": "250um",
    "pos_x": "-0.85mm",
    "pos_y": "2.0mm",
    "orientation": "15",
    "subtract": "False",
    "helper": "False",
    "chip": "main",
    "layer": "1",
}
NGon(design, "ngon", ops)
NGon(design, "ngon_negative", {**ops, **dict(subtract=True, radius="350um")})
gui.rebuild()
[65]:
gui.zoom_on_components(["ngon_negative"])
gui.screenshot()
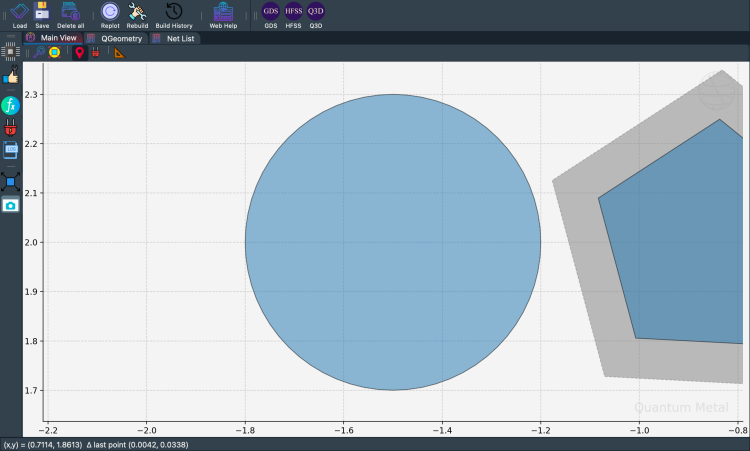
[66]:
from qiskit_metal.qlibrary.sample_shapes.circle_raster import CircleRaster

display(CircleRaster.get_template_options(design))

ops = {
    "radius": "300um",
    "pos_x": "-1.5mm",
    "pos_y": "2mm",
    "resolution": "16",
    "cap_style": "round",
    "subtract": "False",
    "helper": "False",
    "chip": "main",
    "layer": "1",
}
CircleRaster(design, "CircleRaster", ops)
gui.rebuild()
{'pos_x': '0.0um',
 'pos_y': '0.0um',
 'orientation': '0.0',
 'chip': 'main',
 'layer': '1',
 'radius': '300um',
 'resolution': '16',
 'cap_style': 'round',
 'subtract': 'False',
 'helper': 'False'}
[67]:
gui.zoom_on_components(["CircleRaster"])
gui.screenshot()
[68]:
from qiskit_metal.qlibrary.sample_shapes.rectangle_hollow import RectangleHollow

display(RectangleHollow.get_template_options(design))

ops = {
    "width": "500um",
    "height": "300um",
    "pos_x": "-2.3mm",
    "pos_y": "2mm",
    "orientation": "0",
    "subtract": "False",
    "helper": "False",
    "chip": "main",
    "layer": "1",
    "inner": {
        "width": "250um",
        "height": "100um",
        "offset_x": "40um",
        "offset_y": "-20um",
        "orientation": "15",
    },
}
RectangleHollow(design, "RectangleHollow", ops)
gui.rebuild()
{'pos_x': '0.0um',
 'pos_y': '0.0um',
 'orientation': '0.0',
 'chip': 'main',
 'layer': '1',
 'width': '500um',
 'height': '300um',
 'subtract': 'False',
 'helper': 'False',
 'inner': {'width': '250um',
  'height': '100um',
  'offset_x': '40um',
  'offset_y': '-20um',
  'orientation': '15'}}
[69]:
gui.zoom_on_components(["RectangleHollow"])
gui.screenshot()
[70]:
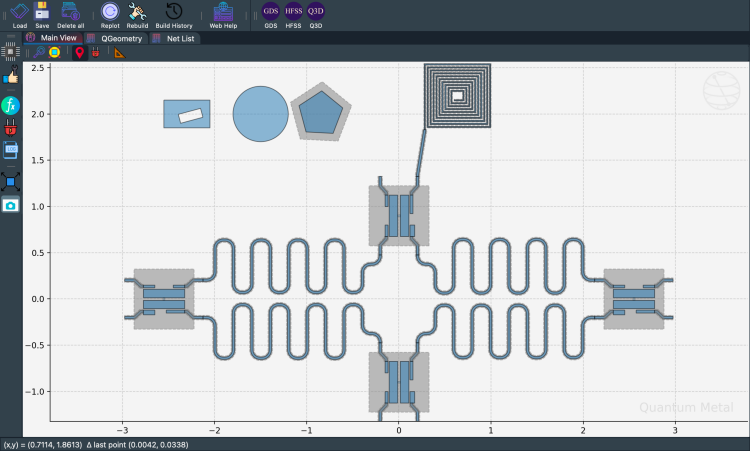
gui.autoscale()
gui.screenshot()
Next steps
Write your own QComponent: see 2.3 How do I make my custom QComponent
Export any of these shapes to GDS: see 1.3 Saving Your Design
For more information, review the Introduction to Quantum Computing and Quantum Hardware lectures below
|
Lecture Video | Lecture Notes | Lab |
|
Lecture Video | Lecture Notes | Lab |
|
Lecture Video | Lecture Notes | Lab |
|
Lecture Video | Lecture Notes | Lab |
|
Lecture Video | Lecture Notes | Lab |
|
Lecture Video | Lecture Notes | Lab |