How to Set Up IBM Quantum Access Credentials for Prefect
This guide explains how to configure Prefect Qiskit integration to access IBM Quantum services from the MDX workflow server.
Prerequisites
Before you begin, ensure the following:
- You have created a Python virtual environment by following How to Set Up Python Environment on Fugaku.
- You have generated an API Key for the IBM Quantum Platform.
If you use Prefect Cloud for workflow management, also ensure:
- You have created an API Key for the Prefect Cloud workspace.
Instructions
Step 1: Execute the interact session for Pre/Post Node.
Execute the interact session for Pre/Post Node.
![]()
srun -p mem2 -n 1 --mem 4G --time=60 --pty bash -i
Step 2: Install Prefect Qiskit Package
Activate your virtual environment:
![]()
source ~/venv/prefect/bin/activate
![]()
uv pip install prefect-qiskit
export SSL_CERT_FILE=$(python -c 'import certifi; print(certifi.where())')
SSL_CERT_FILE is not set, IBM Quantum access may fail with
[SSL: CERTIFICATE_VERIFY_FAILED] unable to get local issuer certificate.
Step 3: Configure Prefect Profile
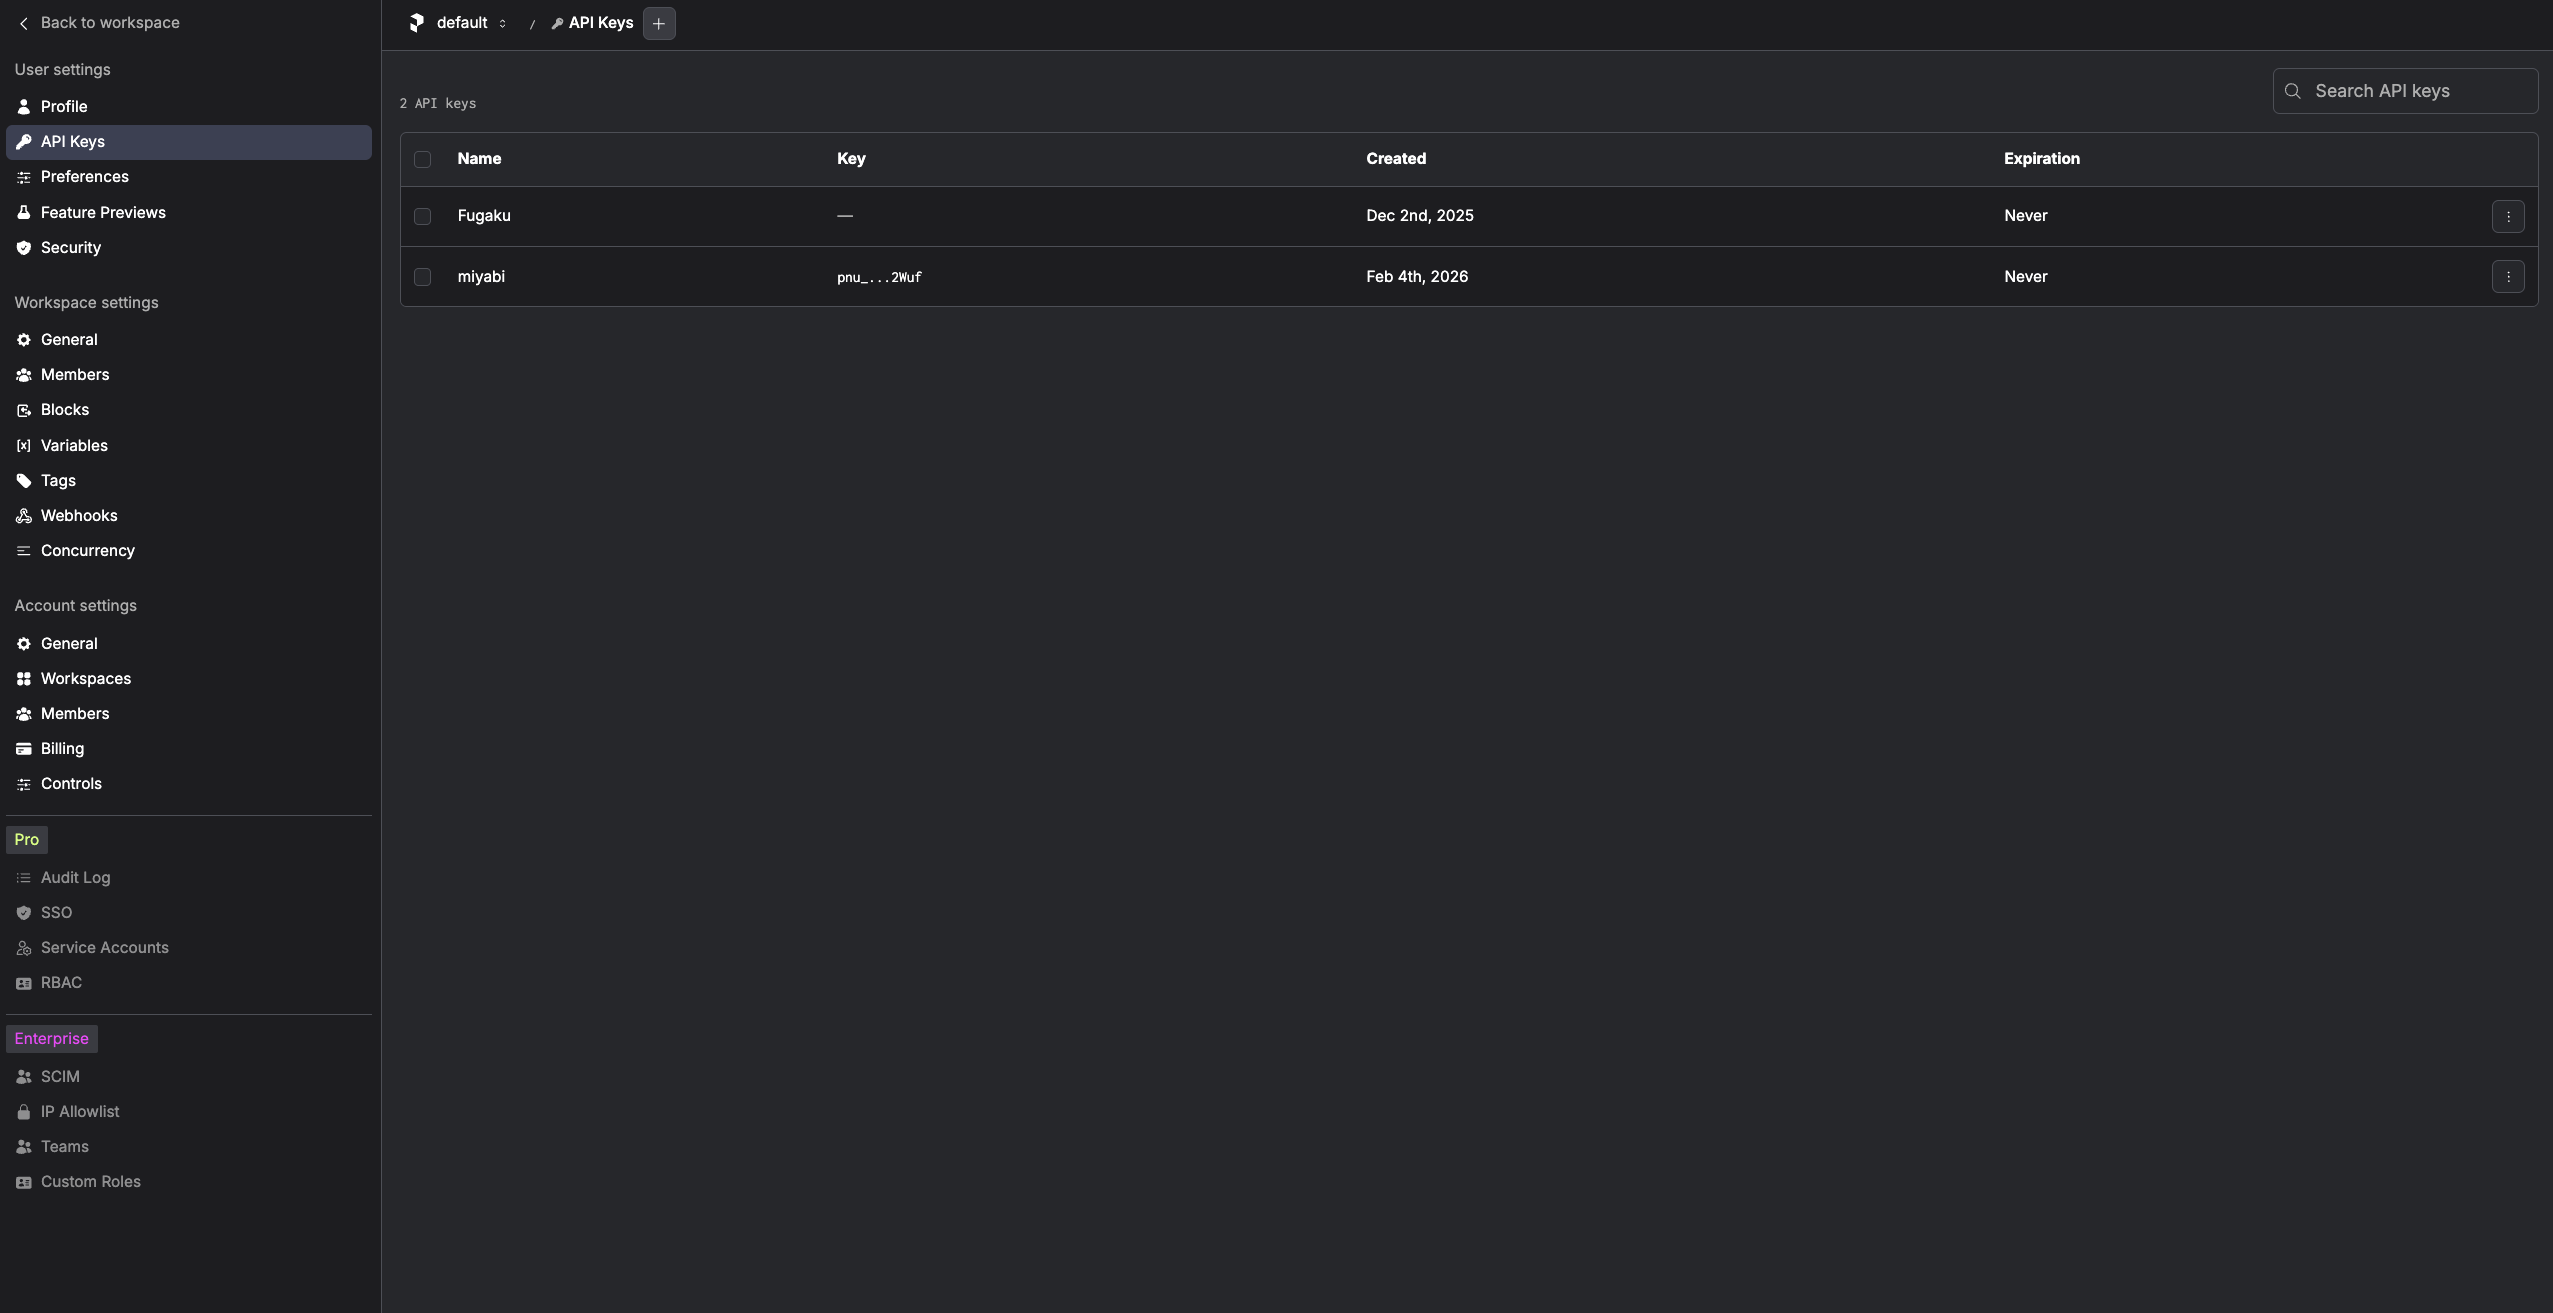
Create API Key in Prefect Cloud. Settings -> API Keys
Log in to your Prefect Cloud workspace using your API key:
![]()
prefect cloud login -k '<my-api-key>'
Create and switch to a new Prefect profile:
![]()
prefect profile create cloud-fugaku && prefect profile use cloud-fugaku
Step 4: Register IBM Quantum Blocks
Register the block schemas for Qiskit integration:
![]()
prefect block register -m prefect_qiskit
prefect block register -m prefect_qiskit.vendors
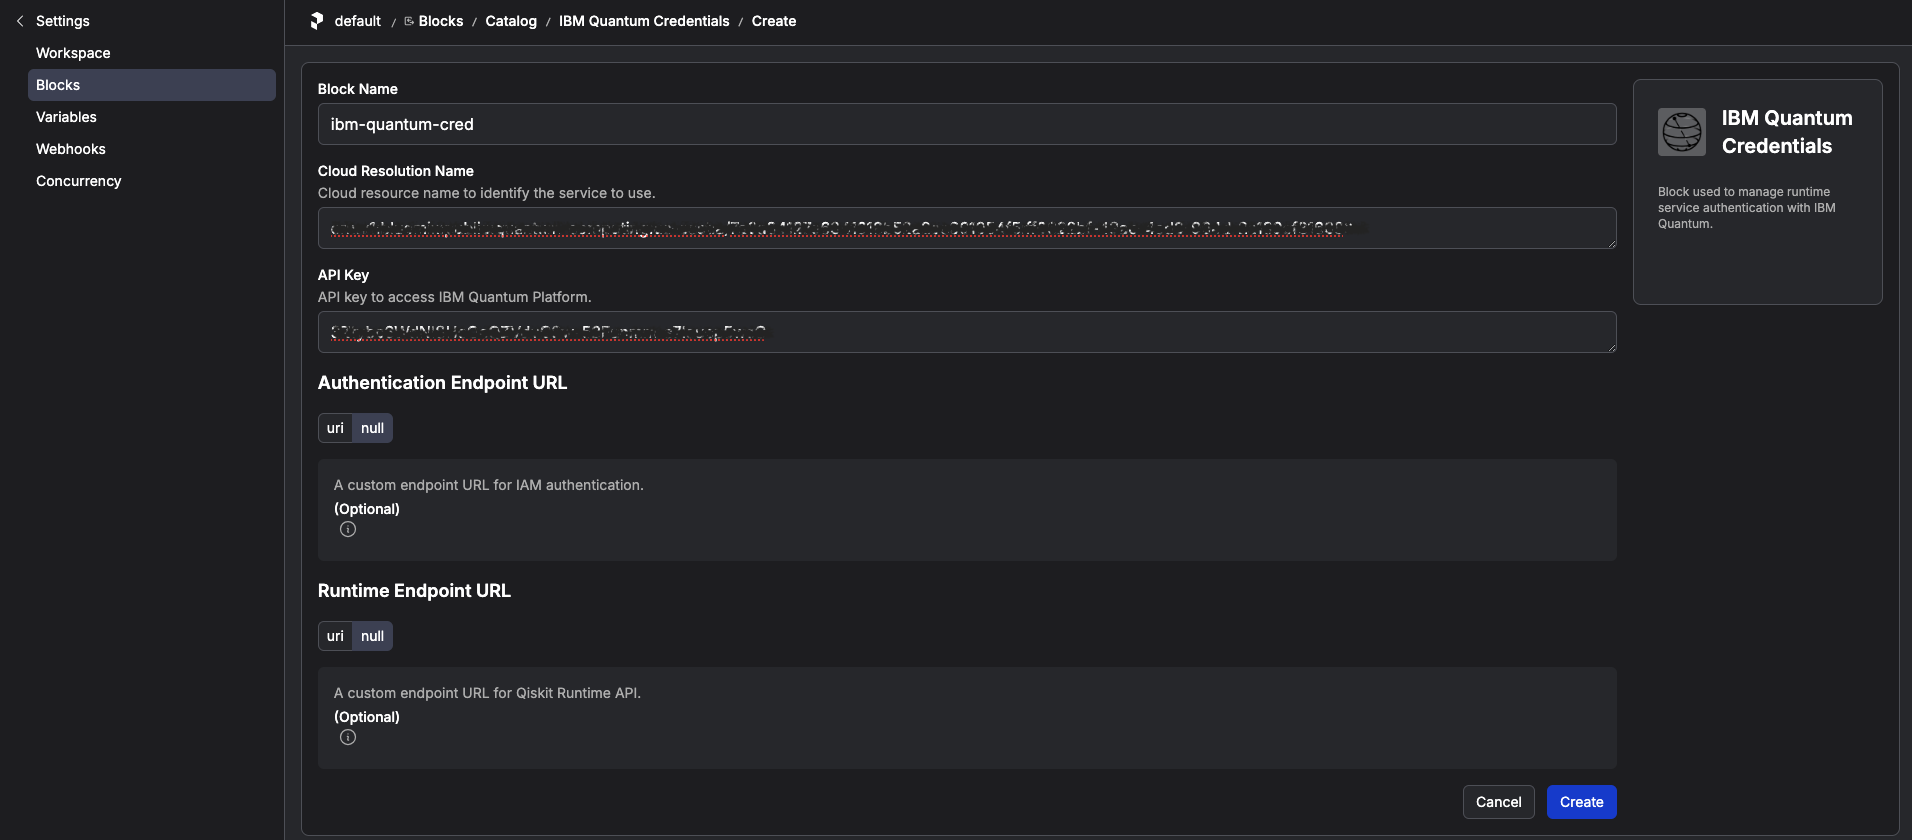
Create the IBM Quantum Credentials block:
![]()
prefect block create ibm-quantum-credentials
This command will display a URL to the Prefect console. Open it in your browser and enter your IBM Quantum instance's CRN and API Key to create the block.
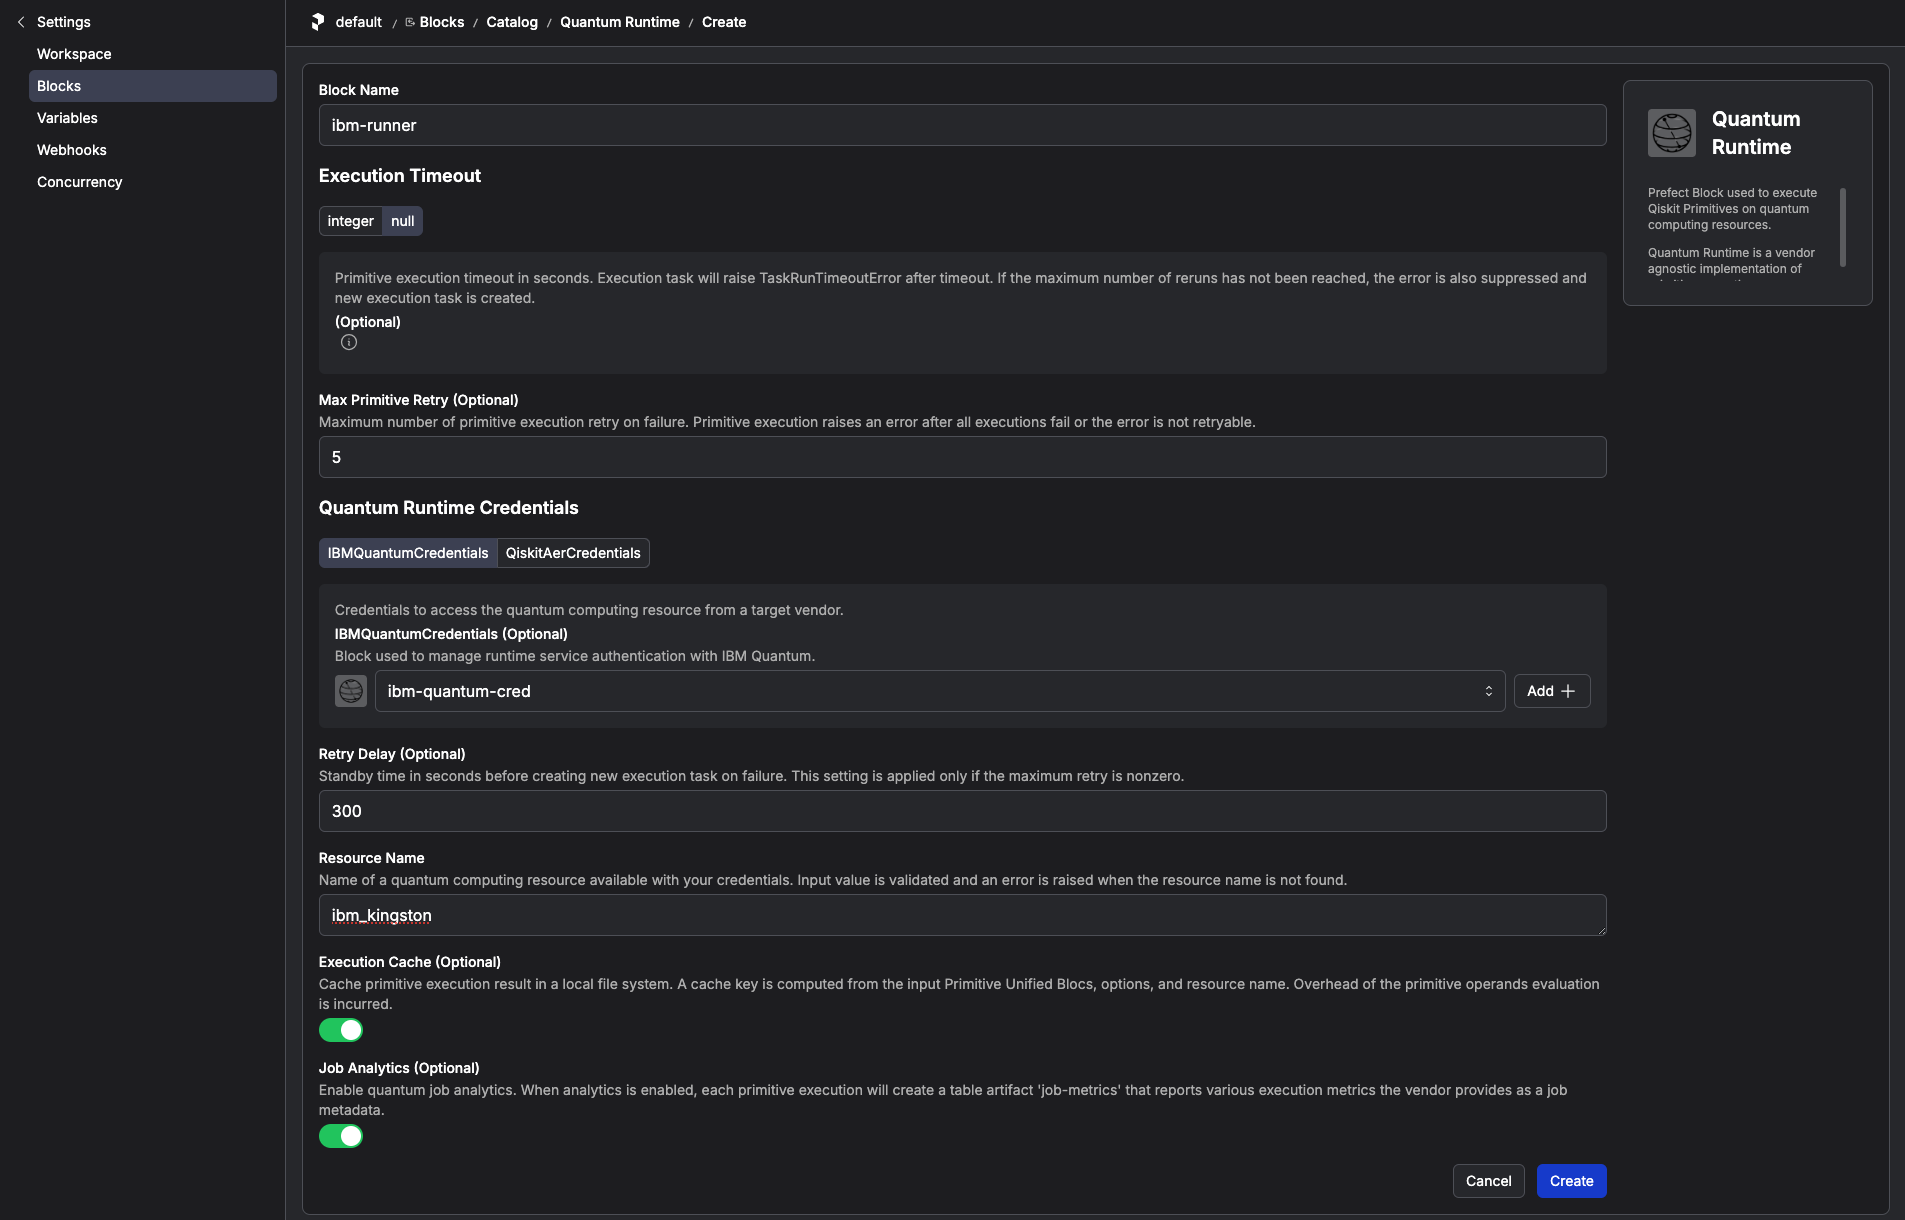
Then, enter the following:
![]()
prefect block create quantum-runtime
Follow the URL shown to configure the runtime block. Specify the IBM Quantum backend name and link the credentials block you created above. You can also configure preferences for Qiskit primitive execution.
[!NOTE] If a real IBM Quantum backend such as
ibm_kobeis not available, you can configure Qiskit Aer as an alternative backend. Follow the official prefect-qiskit tutorial here: Use Qiskit AerIn the Aer setup, create a
Qiskit Aer Credentialsblock and configure theQuantumRuntimeblock withResource Name = aer_simulator. If you already created the tutorial Variable for the Fugaku workflow, delete it from Prefect before switching to Aer because it cannot be used in this setup:fugaku-bitcount-options
Confirm you have access to the blocks you created:
![]()
prefect block ls
Example output:
┏━━━━━━━━━━━━━━━━━━━━━━━━┳━━━━━━━━━━━┳━━━━━━━━━━━━━┳━━━━━━━━━━━━━━━━━━━━━━━━━━━━━━━━━━┓
┃ ID                     ┃ Type      ┃ Name        ┃ Slug                             ┃
┡━━━━━━━━━━━━━━━━━━━━━━━━╇━━━━━━━━━━━╇━━━━━━━━━━━━━╇━━━━━━━━━━━━━━━━━━━━━━━━━━━━━━━━━━┩
│ 9d87e2a8-e7b8-4e3b-98… │ IBM Quan… │ ibm-quantu… │ ibm-quantum-credentials/ibm-qua… │
│ 8c9e4ff7-b09a-4f11-bc… │ Quantum … │ ibm-runner  │ quantum-runtime/ibm-runner       │
└────────────────────────┴───────────┴─────────────┴──────────────────────────────────┘
If the blocks don't appear, it's likely that the Prefect profile setup failed. Go back to Step 3 and ensure you have successfully logged in to the Prefect Cloud workspace.