How to Connect to Prefect Web Portal from MDX (On-Prem or Prefect Cloud)
This guide explains two supported ways to use Prefect from MDX:
- Option A: On-Prem Prefect on MDX (
prefect-portal-host) - Option B: Prefect Cloud (
https://app.prefect.cloud)
Choose one backend and use it consistently for block creation, variable creation, and flow runs.
Prerequisites
Before you begin, ensure the following:
- You can access the MDX workflow client.
- You have created a Python virtual environment by following How to Set Up Python Environment on the MDX Workflow Server.
- You have Prefect installed in that environment (
uv pip install prefect). - You will use one of the following:
- On-Prem: an account provisioned by your administrator
- Prefect Cloud: a Prefect Cloud account and API key
Instructions
[!IMPORTANT] Replace
z12345with your actual account name.
Step 1: Log in to the MDX Workflow Client
Connect to the MDX workflow client:
![]()
ssh -A z12345@mdx-workflow.example.org
Activate your virtual environment:
![]()
source ~/venv/prefect/bin/activate
Step 2: Storage setup on MDX and Clone git repository
The home directory size on the MDX workflow client may be limited.
You can place Prefect local files on /large:
![]()
mkdir -p /large/z12345/.prefect
mv ~/.prefect ~/.prefect.bak.$(date +%Y%m%d%H%M%S) 2>/dev/null || true
ln -sfn /large/z12345/.prefect ~/.prefect
After this, you clone the tutorial repository:
![]()
cd /work/gz00/z12345
git clone git@github.com:qiskit-community/qcsc-prefect.git
Step 3: Choose your Prefect backend
Use either A (On-Prem) or B (Prefect Cloud).
Step 3A: Connect to On-Prem Prefect on MDX
Open the following URL in your browser:
https://prefect-portal.example.org/z12345/
You will be redirected to the SSO login page. Use the same email address that was registered by the administrator.

From the MDX shell, run:
![]()
prefect-auth login
When prompted, open the generated URL, complete IBMid login, and paste the returned code value into the terminal.
prefect-auth login
# Using SSO login flow.

# Please open this URL in your browser and log in via SSO:
https://us-south.appid.cloud.ibm.com/oauth/v4/xxxxxxxxx/authorization?client_id=xxxxxxxxxxxxxxxxx&response_type=code&scope=openid%20email%20profile%20offline_access&redirect_uri=https%3A%2F%2Fprefect-portal.example.org%2Ftoken-callback&state=xxxxxxxxxxxx

After login, copy the URL you were redirected to and paste the 'code' parameter below.

Authorization code:

Create and use an on-prem profile:
![]()
prefect profile create mdx
/work/gz00/z12345/qcsc-prefect/scripts/prefect_sync_env_to_config.sh -p mdx
Check current configuration:
![]()
prefect config view
Expected values include:
PREFECT_PROFILE='mdx'
PREFECT_API_URL='https://prefect-portal.example.org/z12345/api'
PREFECT_CLIENT_CUSTOM_HEADERS='{"Authorization":"Bearer ..."}'
Step 3B: Connect to Prefect Cloud
Open Prefect Cloud in your browser:
https://app.prefect.cloud
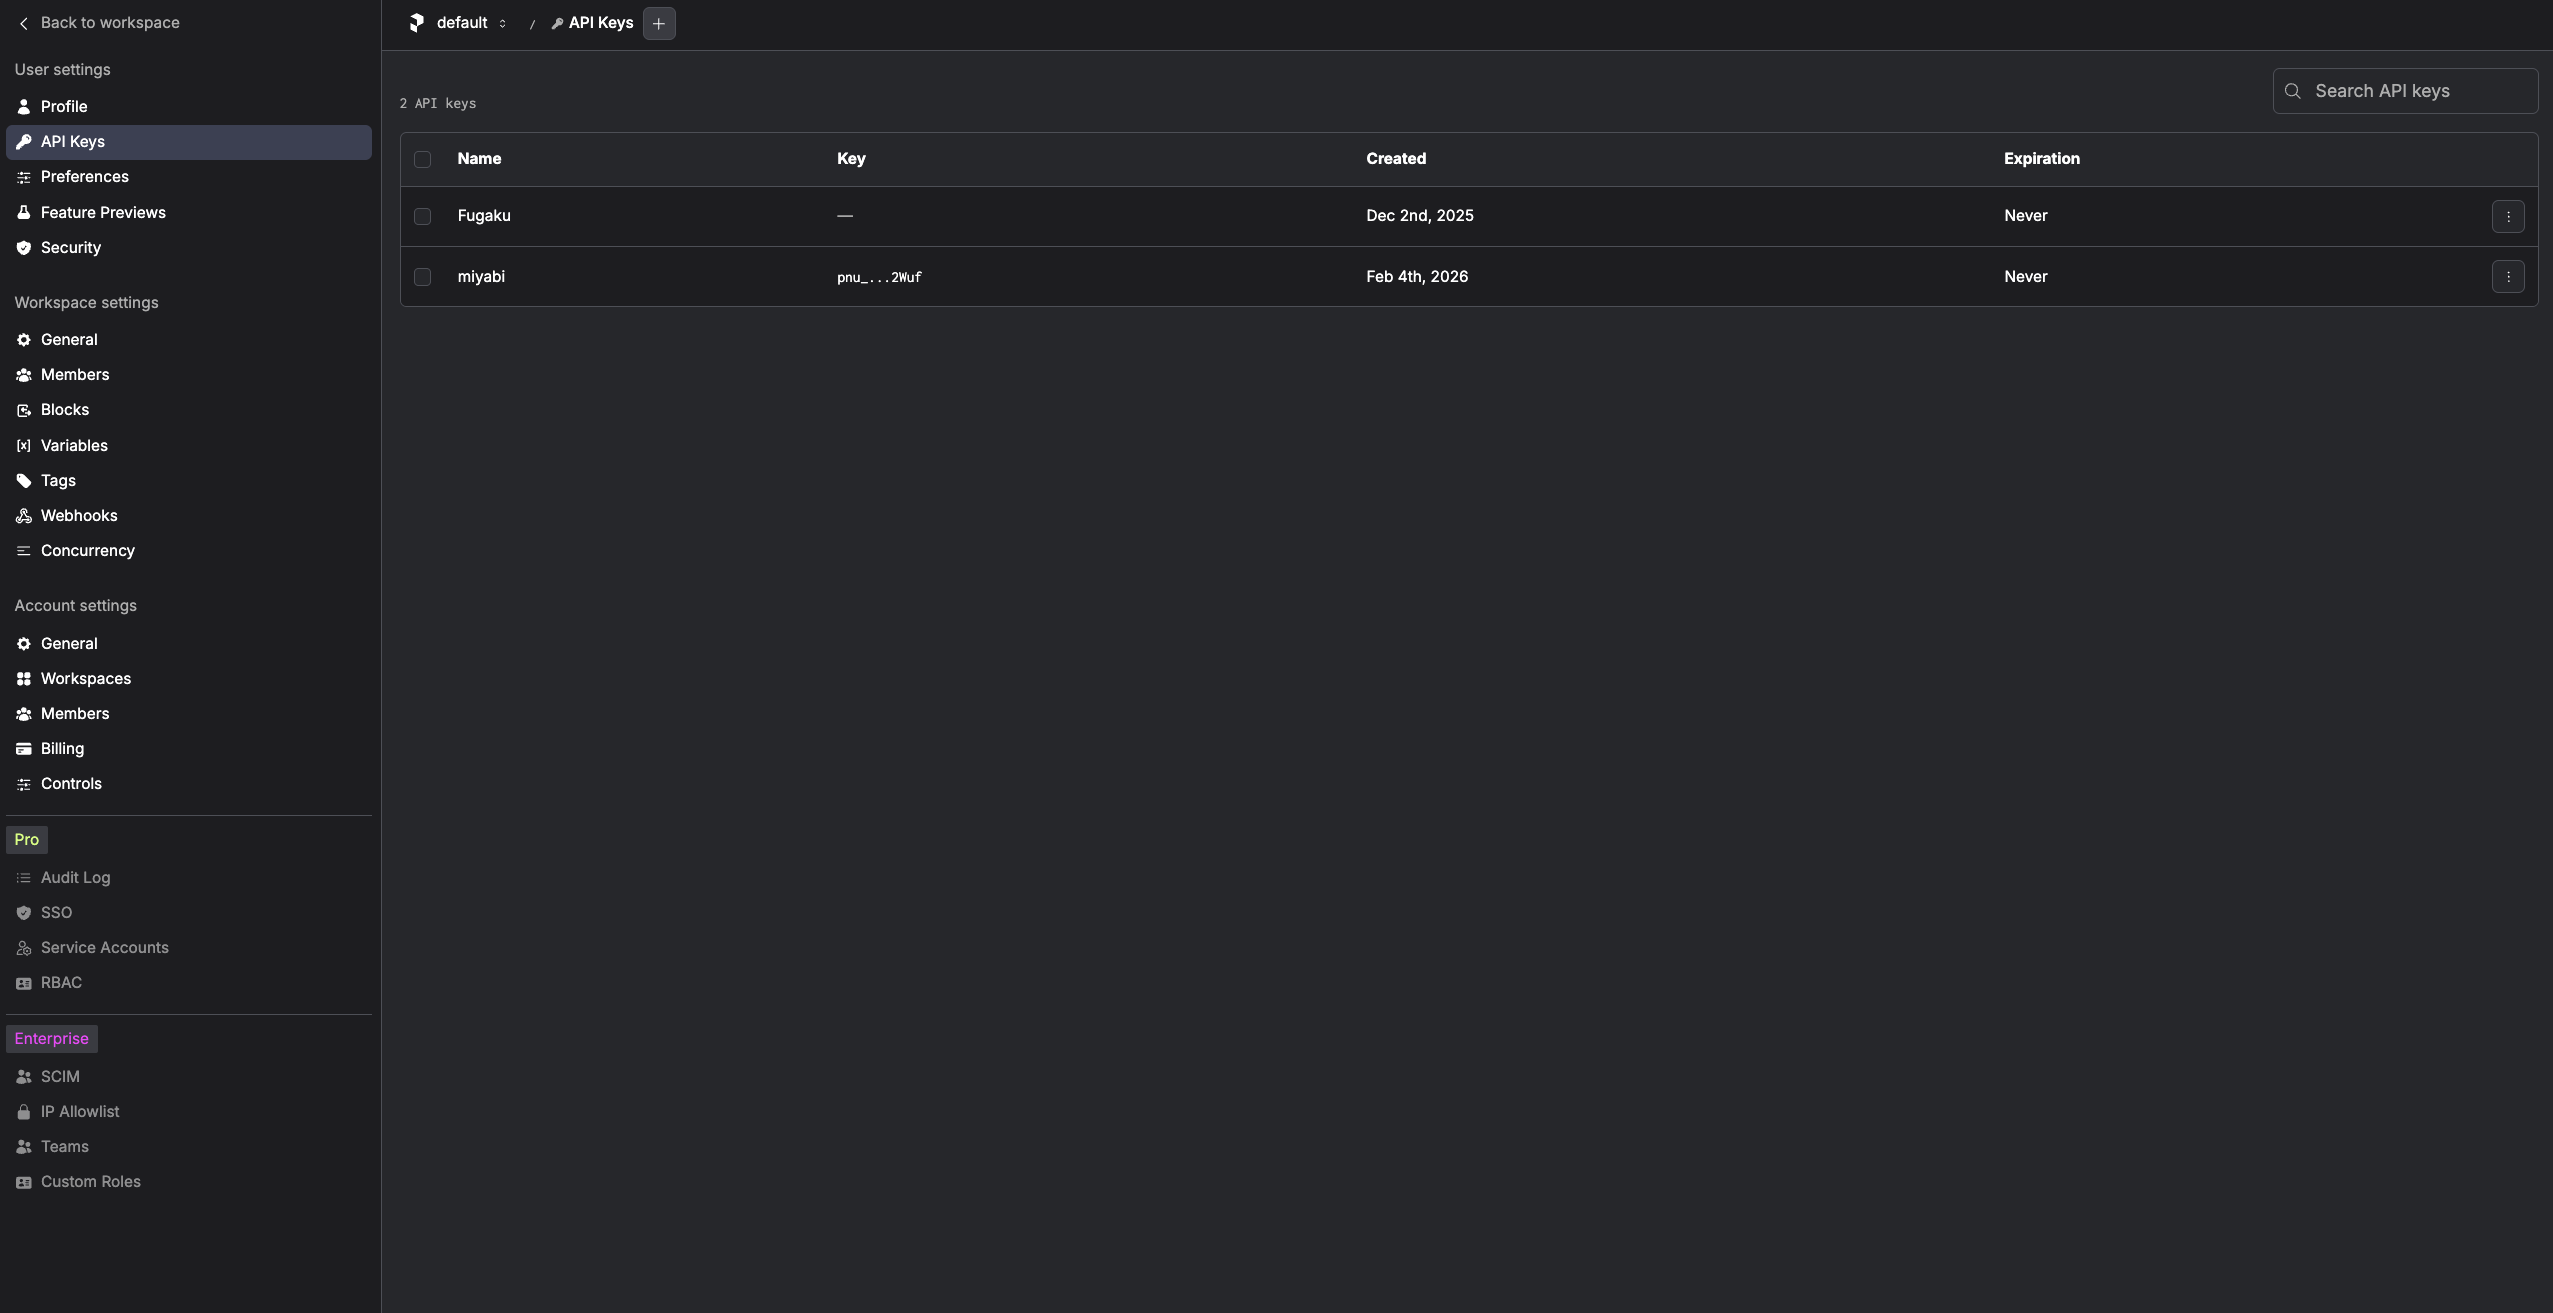
Create an API key from Profile Settings -> API Keys.
On the MDX shell, create and use a cloud profile:
![]()
prefect profile create mdx
prefect profile use mdx
prefect cloud login --key "<PREFECT_API_KEY>"
Check current configuration:
![]()
prefect config view
Expected values include:
PREFECT_PROFILE='mdx'
PREFECT_API_URL='https://api.prefect.cloud/api/accounts/.../workspaces/...'
[!NOTE] On the Prefect Cloud Hobby (free) tier, workflow metadata retention is 7 days.
Step 4: Test Run
Run a simple flow to verify your selected backend is reachable:
![]()
prefect shell watch 'echo Hello World'
You will see output like:
01:53:39.122 | INFO    | Flow run 'industrious-rooster' - Beginning flow run 'industrious-rooster' for flow 'Shell Command'
01:53:39.132 | INFO    | Flow run 'industrious-rooster' - View at ...
01:53:39.138 | INFO    | Flow run 'industrious-rooster' - Hello World
01:53:39.158 | INFO    | Flow run 'industrious-rooster' - Finished in state Completed()
If this step succeeds, your MDX environment is ready for block/variable operations on the selected backend.
END OF GUIDE